Soldering Instructions - V1¤
Version from 2021
How to Proceed¤
- Always solder only one level at a time.
- Take one component from the holder, solder it, and only after that take another one. (They are easy to mixup.)
- Once you have soldered everything, glue a padding underneath the USB connector.
Important Information
- Start by soldering the integrated circuit. As last solder the LED.
- Be mindful of the orientation of the integrated circuit. If you're unsure, ask the instructor.
- Polarity usually matters with LEDs. However, on this board, you don't have to worry about polarity; the circuit is designed to be polarity-agnostic.
Work Safety
- The tip of the soldering iron is hot (~300 °C).
- Always place the soldering iron back in its stand.
- Keep your workspace tidy.
- If you get burned, go and cool the burned area with water (do not use ice). Don't rub anything on the burned area.
L0¤
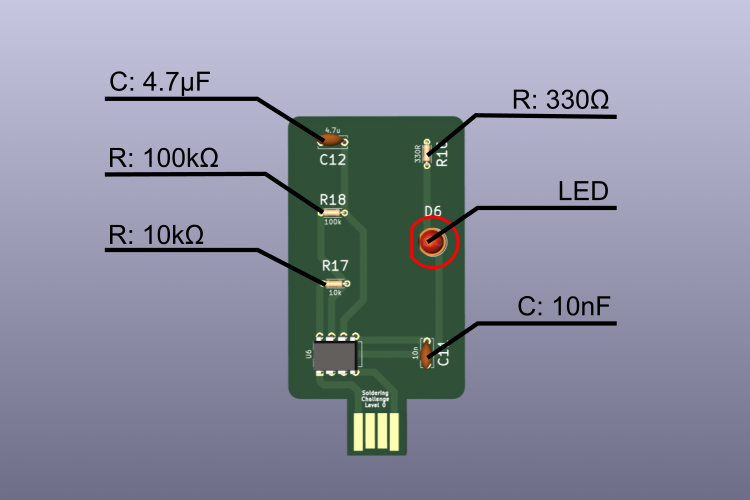
Danger
Attention, the polarity of the 4.7u capacitor matters. The capacitor's label must point outwards from the board. Ask the instructor if you're unsure.
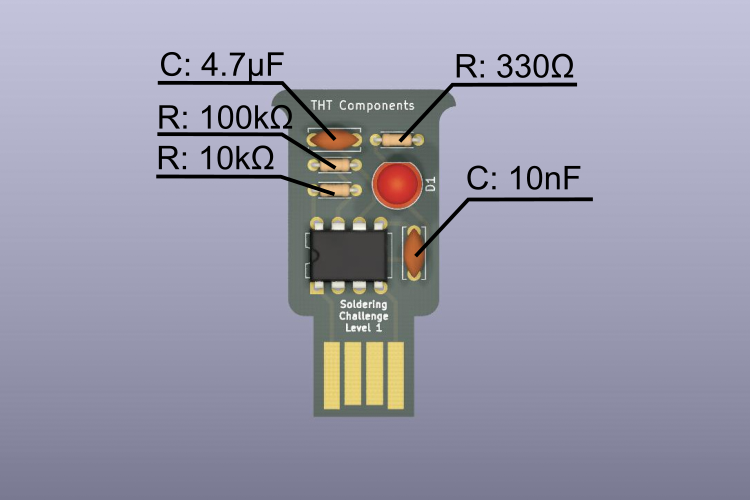
L1 - THT¤
Danger
Attention, the polarity of the 4.7u capacitor matters. The capacitor's label must point outwards from the board (opposite to L0). Ask the instructor if you're unsure.
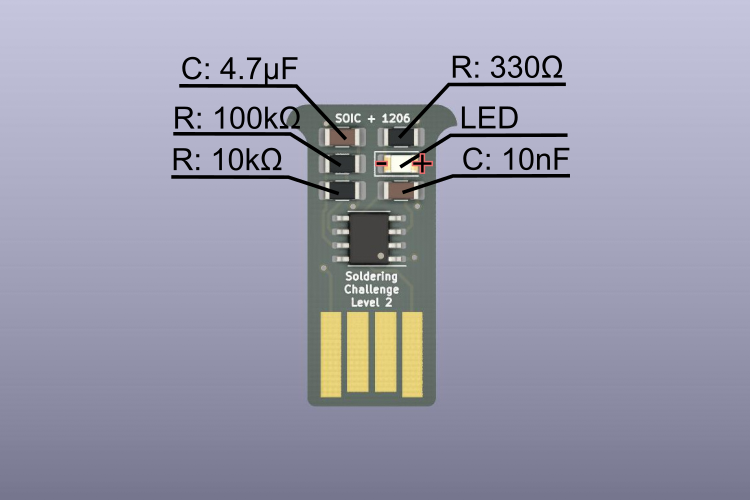
L2 - 1206¤
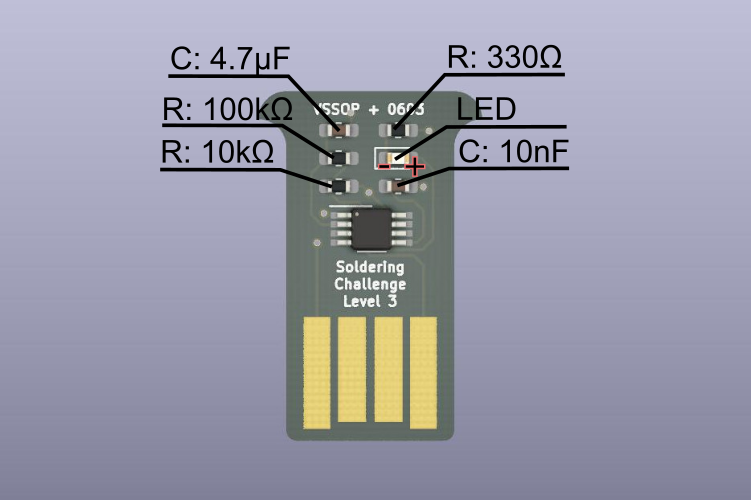
L3 - 0603¤
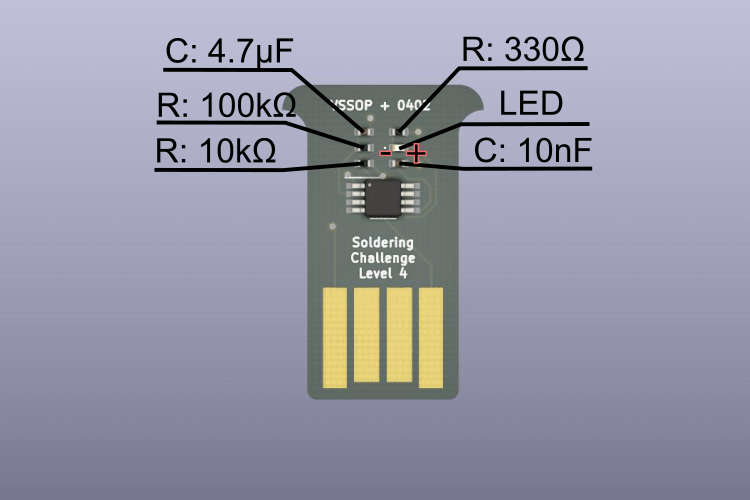
L4 - 0402¤
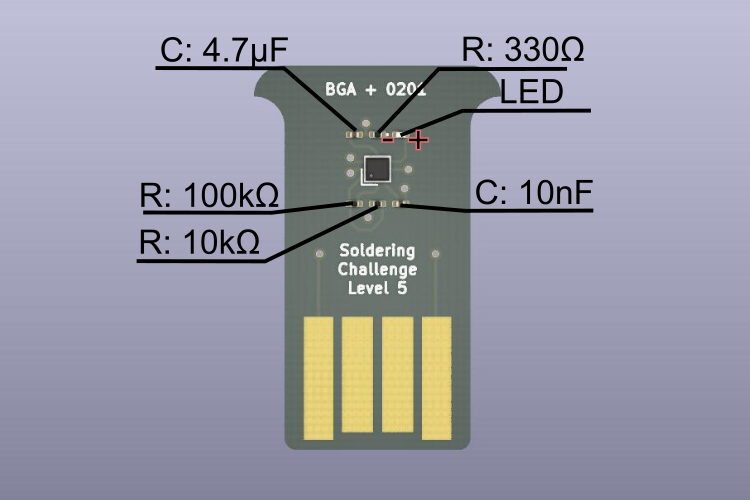
L5 - BGA + 0201¤
Last update:
July 8, 2025